Written back on July 25 just after our new fridge was delivered.
Throughout the past 24 hours Dave and I keep looking at each other and saying things like, "could that have been any more miraculous?" We have both been reading through the Old Testament and it says over and over that the stories were to be told to their children and written down for the generation to come. Tell the stories of God's faithfulness regularly so that when things aren't as clear you remember His goodness.So here is the story of the our new fridge.
Three out of our four kids have colds. Anna had a terrible night, the kind where it doesn't really feel like the day begins at six, but at nine the night before when you thought you were going to bed. A trip to see the doctor is definitely at the top of the day. I noticed that the milk felt different and there was some condensation, but tyranny of the urgent won. We went to see the doctor in Owensboro.
With a "just summer colds" diagnosis we arrive home right at lunch time. I go straight to the fridge to make a bottle for Anna and I know that things aren't right. Sure enough, food in the freezer is also starting to thaw. I call Dave and leave a message, then send him a text message as well. I move the freezer things to the deep freeze, call Samsung to see if I can get any service recommendations, fend off a thousand questions from the kids, try to find a service man online (not how to do it in rural KY), and then give up and move the fridge food to the mini-fridge and coolers.
Side note: I laughed at Dave's college mini fridge when we were first married. That mini-fridge has saved us through several tricky refrigerator situations!
Dave finishes his lunch meeting and gives me a call. He has already messaged a couple of men and is starting to get some recommendations for guys to call and is on his way home. Once he arrived he checks a few basics and starts leaving messages for the repair men. No one answers his call, but within a half hour or so he gets a call back. This man had a cancellation while he was eating lunch and can come right over. It is a blessing to him and to us.
Later we find out that he is the only service man left in Tell City/Hawesville and that it normally takes a week to get an appointment with him. He was at the house within the hour of Dave's call. Miracle.
He went to work on the fridge. I was thankful for Dave's flexible schedule that afternoon. Barry even came by the house to work on a flyer so Dave could help me! Then we got the diagnosis: a stuck compressor. He said a new compressor is as much a new appliance and his recommendation was to start fresh.
This man was really nice and let us ask him a load of questions about brands, warranties, appliance stores, deals, and types of fridges. He was able to give us local recommendations and the knowledge of which machines he was fixing most often. We felt like this conversation and the time he took talking to us set us up for the next phase of the process.
We decided to go to a local store in Tell City that was open until 5:30. We arrived around 4:45, each child armed with a favorite book and the admonition to stay quiet and still. A salesmen showed us around what they had, told us a little of what they had in stock, and explained that they delivered to KY once a week. If we ordered a refrigerator that would be 7-10 days for delivery to the store, then up to a week before they made their KY deliveries. We were a little bummed that they didn't have what we were looking for in the store, but when we described it the salesman went to get an invoice for a delivery they were doing the next day. It was for the exact type of fridge we were looking for, in the right color, at a reasonable price. He said that it was being picked up from a supplier and delivered to KY tomorrow. If we liked it, they would just pick up two units and have it to the house later in the day.
What?!?! It could have easily taken us two weeks to have a new fridge in the house, and that is only if we decided on one right away. God's goodness.
Our maintenance man said it wasn't advertised, but they would price match with Lowes and Home Depot. Sure enough he knocked the price down a little lower. By 5:15 we were paid up walking out the door. (Or rather chugging . . . the kids and I played train while Dave did paperwork.) We painted behind behind the fridge while it was empty and easy to move, a spot I didn't get to when I painted the kitchen, and then scrubbed the floor that night.
I expected the delivery late in the day, but heard a knock just after noon. At 1:00 they were rolling away with the old fridge and our new baby was cooling down in it's freshly painted home. (Mom, remember that time you helped Dave pick up a new-to-us fridge and move the old one out? "Measured" will now forever be in quotes when it comes out of Dave's mouth.)
Over the last year not a lot of things have gone as planned. We have wondered why things have gone the way they did. How could that have been God's goodness? And we read His word and trust Him through it all. Then we have days like yesterday. Twenty-four hours from discovering a warm fridge we have a new one quickly getting cool.
Miracle.
Showing posts with label projects. Show all posts
Showing posts with label projects. Show all posts
Tuesday, December 5, 2017

Thursday, March 22, 2012
Painting! [finally :)]
We have paint on the walls...and it is pretty! First, we used Discover card cash back rewards to get gift cards to Ace. In our first trip we brought home 4 samples: shades of green, yellow, navy, and blue/gray. The green, as well as the subsequent green we tried, were both too bright. The yellow is pretty good, but we might try one more. The navy was too dark. The blue/gray was perfect! We decided to use the blue/gray in our bathrooms and Dave in particular went quickly to work one weekend.
Step 1: sand all the walls with our nifty new sander (they had texture from the wallpaper glue)
Step 2: clean the whole house, which was covered in a layer of dust
Step 3: paint the ceiling
Step 4: prime the walls
Step 5: paint the walls!!!
The walls only seemed to need one coat. We then spent Monday doing a thorough cleaning of the bathroom and touch up work to connect our white trim to our new blue walls.
.JPG)
.JPG)
.JPG)
.JPG)
.JPG)
.JPG)
We are so pleased! This weekend bathroom project taught us much about the painting process and we look forward to transforming the rest of our home.
Step 1: sand all the walls with our nifty new sander (they had texture from the wallpaper glue)
Step 2: clean the whole house, which was covered in a layer of dust
Step 3: paint the ceiling
Step 4: prime the walls
Step 5: paint the walls!!!
The walls only seemed to need one coat. We then spent Monday doing a thorough cleaning of the bathroom and touch up work to connect our white trim to our new blue walls.
.JPG) | |
| Sorry, Dave Ramsey. Credit card points are painting our house! |
BEFORE
.JPG) |
| The colored spot on the left wall is the navy that turned out to be too dark for the space. |
.JPG)
.JPG)
AFTER!
.JPG)
.JPG)
.JPG)
.JPG)
We are so pleased! This weekend bathroom project taught us much about the painting process and we look forward to transforming the rest of our home.
Wednesday, March 21, 2012
Bow Hanger
I kindly ask you to now call me Emily "Craft Queen" Cook. That's right, this not-so-artsy girl made a bow hanger. Dave and I made a fun Monday trip to the shopping center in Wareham a few weekends ago and stopped in a Micheal's. While there, we found an awesome big roll of pink ribbon on sale for $1. That led to the hunt for the perfect piece to which we could attach the ribbon. We stumbled upon the perfect size chalk board that was on sale for $.99. Score! With a little white paint from home, hot glue, a nice bow I could never make twice in a row, and a thumb tack/wire rigging for hanging, Sarah now, at 19 months, finally has a bow hanger.
This bow hanger has meant much more variety amongst the simple bows that Sarah wears to keep her hair out of her face. (We plan to put off the first hair cut for as long as possible...) The most gratifying moment was the first time Sarah saw it above the changing table. Her bows weren't even attached yet and she just kept excitedly saying, "bow, bow, BOW!" It was like she wanted me to take notice, there was something new and fun in her room and she recognized it. Plus, it was one big bow compared to her normal like ones. Alas, my $2, 2 hour project has brought us much joy. Maybe it has even inspired a spirit of craftiness that will linger for while.
This bow hanger has meant much more variety amongst the simple bows that Sarah wears to keep her hair out of her face. (We plan to put off the first hair cut for as long as possible...) The most gratifying moment was the first time Sarah saw it above the changing table. Her bows weren't even attached yet and she just kept excitedly saying, "bow, bow, BOW!" It was like she wanted me to take notice, there was something new and fun in her room and she recognized it. Plus, it was one big bow compared to her normal like ones. Alas, my $2, 2 hour project has brought us much joy. Maybe it has even inspired a spirit of craftiness that will linger for while.
.JPG) |
| Here is the newly finished bow hanger on the kitchen table... |
.JPG) |
| ...hanging over the changing table... |
.JPG) |
| ...loaded with bows! |
Saturday, March 10, 2012
Cloth Diapering
Dave, Sarah, and I have embarked on a new adventure- cloth diapering. We did not ever consider cloth diapers when we were expecting Sarah, as we were paying for laundry by the load. Sometimes it seemed too expensive to just wash our clothes!
Here are our two big reasons for making the switch:
1. Long term savings- We had great success with BJ's brand diapers. They came at a low cost, in bulk, and often had a coupon. Diapering sites often talk about how going with cloth saves you middle of the night diapers runs and the thousands of dollars you spend diapering a child. Honestly, their argument didn't sway me as much as it put me on guard for deceitful advertising.
We bought diapers about once a month and spent about $26 a pack. It wasn't breaking the bank by any means, but looking ahead to our baby boy on the way and any other children the Lord may have for us, we wanted to carefully consider the long term costs. Our investment in cloth was hefty, probably the equivalent of just over a year of using disposable diapers. Since we hope to have little ones in diapers for many years to come, we decided it was a worthwhile investment.
Now our monthly costs come in the form of water for washing, oil for water heating, and the time it takes to wash, dry, stuff, and change more frequently. These are significant costs, but ones that we (maybe mostly I) decided could be handled.
2. A friend in the business- There is so much on the internet about cloth diapering. So much of it seemed contradictory to me. As I have studied the product and grown in knowledge, it has become somewhat more clear. But the most influential and encouraging figure was my friend, Meghan, who has been using cloth diapers for a number of months now. Meghan was very honest with me and able to very accurately help me count the costs. She let me drill her with difficult and probably repetitive questions as I tired to figure out if we could really live the cloth diapering lifestyle.
She has also been very influential in problem solving since our diapers arrived. (Think me leaving her a frantic message the day we received our diapers in mail. She called me back that evening- that was Thursday and she had delivered her second child the Saturday before. Yep, she is a best friend.) Sarah is definitely at the large of end of things at this stage and it has taken some work to accurately size the diapers and learn the timing of when to change her. Initially, we were changing pants and sheets quite often. A week into things we are settling into a pretty great system. I am so thankful for Meghan's encouragement!
The method to our madness:
The diaper system we choose is a pocket style. The pocket is made of a waterproof outer layer and quick dry fleece inner layer. An absorbent insert goes inside and can be layered to fit a specific soaking need. (Aka, we put extra layers in at night.) Our diapers are "one size" and can be adjusted through the leg and waist elastics and snap options in the front to fit a child for the majority of their diapering life. We also invested in some biodegradable liners. They go on top of the fleece and mean that a dirty diaper just gets the liner plopped in the toilet. What is left on the diaper is not enough to worry over.
We seem to use 10-12 diapers every two days. My goal is to do laundry every other night. With the 18 diapers we have, this seems to work out perfectly. We now have two baskets next to Sarah's changing table. A small one has a grocery bag liner and holds used wipes and other trash. The diaper pail now holds a waterproof diaper bag. When taking a diaper off Sarah, we shake the insert(s) and liner out/off of the pocket and all the separate pieces are dropped in the pail. On laundry day the whole bag comes out and everything gets dumped in the washer, bag and all.
For laundering, our current method is to start with a cold rinse, then a hot wash with detergent followed by a cold rinse, and one more cold rinse for good measure. (Sarah has gotten a few rashes on her legs and tummy, so I like to make sure all the detergent is out.) I then hang-dry the diapers, liners, and diaper bag. They can all go in the drier, but we want to get as much life as possible out of these guys. If time allows, I do throw the inserts into the drier since a warm dry can help them become more absorbent at this point. At Meghan's recommendation I am using one tablespoon of a cloth diaper detergent that came as part of our package plus one tablespoon of Arm & Hammer Free.
.JPG)
Here are our two big reasons for making the switch:
1. Long term savings- We had great success with BJ's brand diapers. They came at a low cost, in bulk, and often had a coupon. Diapering sites often talk about how going with cloth saves you middle of the night diapers runs and the thousands of dollars you spend diapering a child. Honestly, their argument didn't sway me as much as it put me on guard for deceitful advertising.
We bought diapers about once a month and spent about $26 a pack. It wasn't breaking the bank by any means, but looking ahead to our baby boy on the way and any other children the Lord may have for us, we wanted to carefully consider the long term costs. Our investment in cloth was hefty, probably the equivalent of just over a year of using disposable diapers. Since we hope to have little ones in diapers for many years to come, we decided it was a worthwhile investment.
Now our monthly costs come in the form of water for washing, oil for water heating, and the time it takes to wash, dry, stuff, and change more frequently. These are significant costs, but ones that we (maybe mostly I) decided could be handled.
2. A friend in the business- There is so much on the internet about cloth diapering. So much of it seemed contradictory to me. As I have studied the product and grown in knowledge, it has become somewhat more clear. But the most influential and encouraging figure was my friend, Meghan, who has been using cloth diapers for a number of months now. Meghan was very honest with me and able to very accurately help me count the costs. She let me drill her with difficult and probably repetitive questions as I tired to figure out if we could really live the cloth diapering lifestyle.
She has also been very influential in problem solving since our diapers arrived. (Think me leaving her a frantic message the day we received our diapers in mail. She called me back that evening- that was Thursday and she had delivered her second child the Saturday before. Yep, she is a best friend.) Sarah is definitely at the large of end of things at this stage and it has taken some work to accurately size the diapers and learn the timing of when to change her. Initially, we were changing pants and sheets quite often. A week into things we are settling into a pretty great system. I am so thankful for Meghan's encouragement!
The method to our madness:
The diaper system we choose is a pocket style. The pocket is made of a waterproof outer layer and quick dry fleece inner layer. An absorbent insert goes inside and can be layered to fit a specific soaking need. (Aka, we put extra layers in at night.) Our diapers are "one size" and can be adjusted through the leg and waist elastics and snap options in the front to fit a child for the majority of their diapering life. We also invested in some biodegradable liners. They go on top of the fleece and mean that a dirty diaper just gets the liner plopped in the toilet. What is left on the diaper is not enough to worry over.
.JPG) |
| From top to bottom: biodegradable liner, insert, and diaper. |
For laundering, our current method is to start with a cold rinse, then a hot wash with detergent followed by a cold rinse, and one more cold rinse for good measure. (Sarah has gotten a few rashes on her legs and tummy, so I like to make sure all the detergent is out.) I then hang-dry the diapers, liners, and diaper bag. They can all go in the drier, but we want to get as much life as possible out of these guys. If time allows, I do throw the inserts into the drier since a warm dry can help them become more absorbent at this point. At Meghan's recommendation I am using one tablespoon of a cloth diaper detergent that came as part of our package plus one tablespoon of Arm & Hammer Free.
.JPG) |
| They arrived!!! |
.JPG) |
| Sarah thinks diapers are big fun. |
.JPG) |
| "Dad, this is photo worthy!" |
.JPG) |
| Here they are drying after the initial washing sequence. |
.JPG)
.JPG) |
| All of the inserts were dried to help boost their absorbency. |
.JPG) |
| Here she is! Fresh out of the bath and in her very first cloth diaper. |
Monday, February 6, 2012
How We Made the Homemade Vanilla, Part 2
After spending late Summer and all Autumn in the closet (minus an occasional shaking), the vanilla vats were ready to come into the light. The beans had diffused well into the vodka, creating a perfect smelling extract

Then the fun began with pouring it into the glass jars we had ordered.


I had put together a simple label for them, and the hardest part turned out to be printing it on the pre-cut label sheets. After some great misadventure, all turned out well, and we were ready to apply them to the bottles.

All that remained was to tie gift labels to them all and plan the mailing and giving. It was a lot of fun, and we love the way it tastes.


Then the fun began with pouring it into the glass jars we had ordered.


I had put together a simple label for them, and the hardest part turned out to be printing it on the pre-cut label sheets. After some great misadventure, all turned out well, and we were ready to apply them to the bottles.

All that remained was to tie gift labels to them all and plan the mailing and giving. It was a lot of fun, and we love the way it tastes.

Friday, February 3, 2012
How We Made the Homemade Vanilla, Part 1
We had a lot of fun making our big Christmas present last year, and have heard many renditions of "how'd you do that?" After doing it, we can't believe how simple it was and how good the result is. Definitely a fun craft.
To make it, we started with two ingredients: liquor and vanilla beans.


We ordered the vanilla beans from a supplier on Amazon who sells them by the bag. This was much more economical than buying them at the grocery store (much much more.) There are generally two types of beans: Tahitian, which is supposed to be good for use as a bean, and Madagascar, which is supposed to be better for making extract. Our purchase of the Madagascar bean on the left came with some free Tahitian beans, so we added one in to our batches of 6 Madagascar for good measure.We heard that could make the flavor more complex, just in case we gave one to an undercover vanilla connoisseur.
Most people use distilled vodka, which we stuck with. But we did make just one small batch with bourbon, which we thought a few particular friends and family members would appreciate.

The next step was to cut the beans down the middle and stick them in the bottles.

After a little fun cutting beans, we were left with this:

What did it look like after a few months? The best part was the waiting and anticipation, so we're going to make you do it too . . .
Friday, January 27, 2012
The End of the Wallpaper
Most of our friends and loved ones knew from day one that there was one thing we truly didn't like about our house: the wallpaper. We've been wanting to take it down for so long, and this MLK weekend the time finally came. We had finished our trim painting project. I had worked Monday in order to get a head start on the Annual Report, and thus got Friday off. Then, choosing to forgo my usual Saturday half-day of studying, our slate was empty for four days, except for church Sunday.
There were, it turns out, five different types of wallpaper in the house. Here you can see, from these old photographs, some of the old Dining Room wallpaper:


This is the paper we first went for on Friday, and it came off as easily as a refrigerator magnet.

In a matter of minutes, the Dining Room looked like this:

The hardest part was getting all the fixtures off, some of which were more complicated than a simple light switch. Then some of our friends had to take an emergency trip to California, similar to our recent trip to Mississippi, and left us with their son Elliot for the afternoon. Elliot is quite smart and all boy, so I quickly realized that the thing he would enjoy most is tearing down the paper himself.
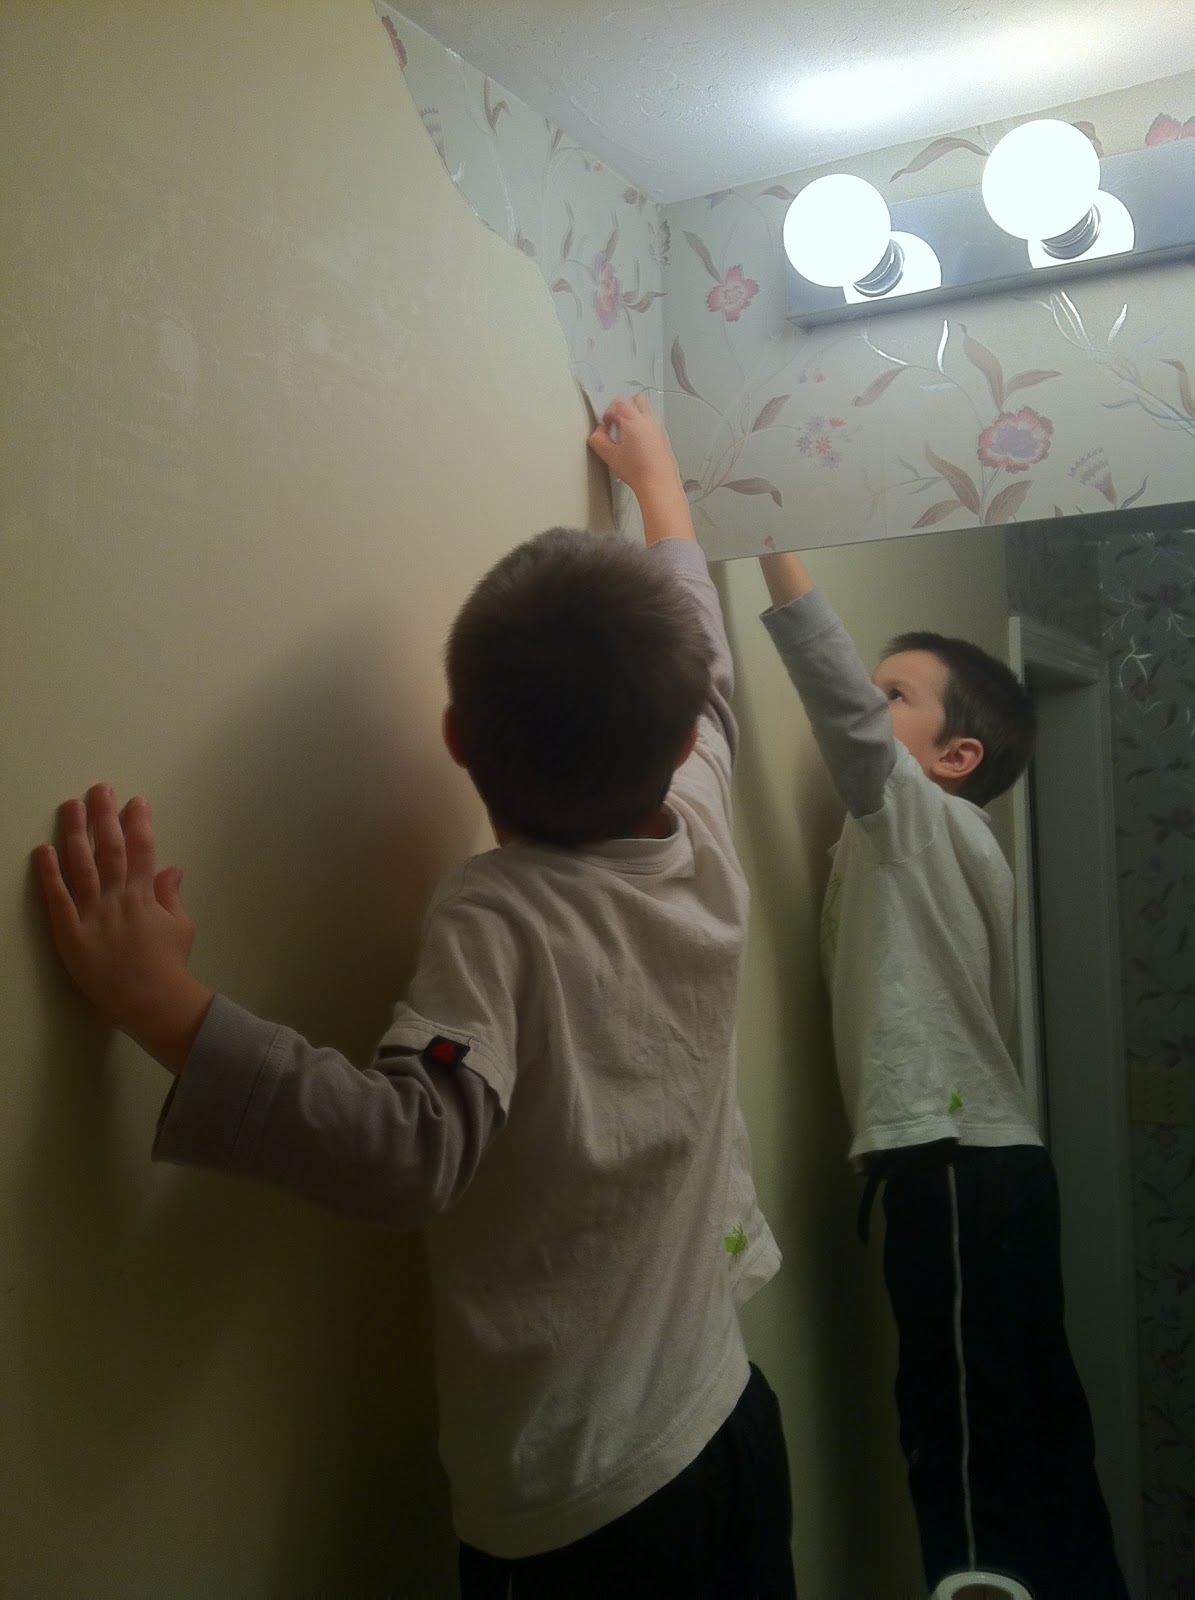
After a few hours, and two bathrooms of wallpaper on the floor, Elliot and I played outside and read until Todd came to pick him up. Then Emily spent the evening taking down the upstairs bathroom while I polished off some details downstairs. We had put in only five hours and had gotten 40% of the house done (and three of the five paper types)!

.JPG)

Saturday morning we got up and attempted to get some of the harder stuff done. The easier stuff was finished, and we felt very encouraged by that. As it turns out, The entire next day would be spend on one wall, this one:

Most wallpaper has some glue underneath, and a little fabric softener is necessary to neutralize it. But a small fraction of wallpaper is also coated in vinyl, which prevents anything from soaking into it (thus preventing anything from dissolving the glue.) This was that small percentage that was as stubborn as it was ugly, and no amount of scoring and soaking would do the trick. I imagine we put in 18 or 20 man-hours that day slowly defeating it.
As aggravated as we were, Sarah was somehow content to play with her toys the whole time:

Sunday afternoon one of our church members came over, which was not only a help but also a catalyst in speeding up our work. We only had two tools to remove it, so I went downstairs to get my old window washing razor for her to use. That, it turned out, was exactly what we needed. The rest of the house had one kind of paper, and it too was difficult. But this razor could get underneath it and was sharp enough to actually cut the top layer off. Then a little fabric softener would soak right in to the under-layer and take it right off. That afternoon we were able to get the whole kitchen done, even behind all the cabinets and appliances.

Then Monday morning came and we were able to use this new technique to finish the entire first floor: both entrances and the hallway outside our bedroom. What a relief to be done!

Now all that remains, for another time, is this tall stairwell. The wall goes about eight feet higher than the top of the picture here (it's funny what you never concern yourself with about your house until you do work on it.) I think I have a plan, but it will require some precarious ladder positioning!

Now comes the part where we take all our dreaming of paint colors and turn it into work!
Tuesday, August 9, 2011
Grandma Lynda's Visit
Of all our guests this summer, nobody's burned more elbow grease than Grandma Lynda. She asked for a project when she came, and boy did we give her one!
We've been wanting to paint the trim white in our new home for a while now, and we decided that would be the perfect project for us while she was here. So we cashed in our credit card points for gift cards, got the supplies, and had everything ready when she got here. Four days of sanding, stripping, taping, priming, painting, painting, and painting later, we had a greater part of the first floor done.
I think Grandma worked harder than any of us, showing she'd painted a few things before in her time. But aside from that, it was great to have her here to enjoy her company, keep Sarah's family familiar to her, and hear of her travels throughout New England. Thanks so much for coming, Grandma!
It's been a while and the trim project is progressing more slowly. By the time Jacki and Mike came into town, we had all the common areas of the house done. We decided to take a break then until all our company and travels are done, and start again in September. But the house looks very different already!
We've been wanting to paint the trim white in our new home for a while now, and we decided that would be the perfect project for us while she was here. So we cashed in our credit card points for gift cards, got the supplies, and had everything ready when she got here. Four days of sanding, stripping, taping, priming, painting, painting, and painting later, we had a greater part of the first floor done.
I think Grandma worked harder than any of us, showing she'd painted a few things before in her time. But aside from that, it was great to have her here to enjoy her company, keep Sarah's family familiar to her, and hear of her travels throughout New England. Thanks so much for coming, Grandma!
 |
| Who loves her great-grandma? |
 |
| Grandma's garage workstation, painting the doors |
 |
| What'cha doin? |
Monday, July 4, 2011
The Old 100th!
If our blog was on the Today Show, Willard Scott would be reading our name from the Smucker's jar.
If it was in Rome, they would be giving it cards that read, "Happy Cth post!"
And if it was a hymn, it would be the classic Doxology.
That's right- this is our 100th post on Walking with the Cooks! As our tag says, we are documenting life as we "live what Christ has prepared for us." Life has changed a lot since since November 2009! You can read our first post here. We are so excited with where the Lord has brought us and we have so enjoyed sharing it with you.
Here's to 100 more!
If it was in Rome, they would be giving it cards that read, "Happy Cth post!"
And if it was a hymn, it would be the classic Doxology.
That's right- this is our 100th post on Walking with the Cooks! As our tag says, we are documenting life as we "live what Christ has prepared for us." Life has changed a lot since since November 2009! You can read our first post here. We are so excited with where the Lord has brought us and we have so enjoyed sharing it with you.
Here's to 100 more!
Wednesday, March 9, 2011
New Fruit!
I want to eat, eat, eat apples and pears!
All new purees for Sarah. Yesterday I chopped, steamed, and processed a few apples and a bag of pears. So far, Sarah is a big fan!

Saturday, October 30, 2010
Pumpkin Fun
What's October without pumpkin carving?
 |
| Dad Carved the church steeple into his |
 |
| Mom carved our family Name |
Tuesday, June 15, 2010
A little more
Here's another picture of Emily, almost a month before the Due Date. The big day is quickly approaching.

Meanwhile, Dave has been working on some wood projects around the house, including a new tea caddy and a serving tray on which to set the pepper, salt, napkins, and everything else.


Meanwhile, Dave has been working on some wood projects around the house, including a new tea caddy and a serving tray on which to set the pepper, salt, napkins, and everything else.


Subscribe to:
Posts (Atom)